Saturday 16 July 2011

And finally, this is the end product through all that steps. Hope you like it...

12. And for the last step, I typed the slogan of MMU and added two lines by using Line Tool to fill the empty area. Later, I used mask layer for both line in order to create a neat gradient to them by apply gradient using Gradient Tool.

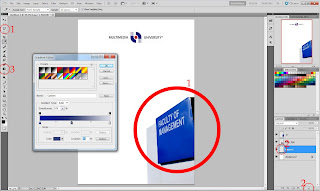
11. Late I selected all the signs with course title along with the texts and re-scaled them down to make more impression on the sign on the right which contains the name of the faculty.

10. I repeated the same method for the rest of the signs so I could fill the poster with the remaining course titles.

9. After that, I used Ctrl+V to pasted an image of my text on the screen and by using Edit Plan Tool I dragged and dropped it on the designated area. Later I adjusted the text to fit the sign perfectly.

8. By using the Create Plan Tool I created the desired plan based on the perspective of the sign.

7. After using the Text Tool to create my own text, I typed the name of a course offered in the Faculty. Then I selected that layer of text and used Ctrl+C to copy it and then I created a new layer. Later, while I had the new layer selected I used the Vanishing Point option in Filter Menu in order to give the proper perspective to my text based on the blank area on the duplicated sign image.

6. After that, I used the Patch Tool and selected the area with the text, grabbed it and moved it to the colored part in order to get rid of the text and replace it with color.

5. Then I used the shortcut Ctrl + U to bring up the Hue/Saturation to change the color of the duplicated image to differentiate it from the original one. I changed the Hue to +131.

4. After applying my desired color to the background, I duplicated the same images and I flipped it by right clicking on the image, and selecting the "flip horizontally" in order to mirror the image. I also used the Free Transform to scale the image down.

3. Then by using the "Polygon Lasso Tool" I cut-out the parts that I did not need from the second image on the bottom of the poster. After I created a new layer above the background Later I use the "Gradient Tool" to set my desired color to apply to the background.

2. Then I dropped all the images that I needed and gathered from the net on to the blank canvas.

In the following post I will be explaining how I made the e-poster for FOM.

1. I opened Adobe Photoshop CS5 and I created a new file in A4 size with 150 dpi resolution.